Just kidding. I haven't shown these yet, mainly because I kept thinking I could get a better picture, but it's just not happening. I wanted coordinating costumes (you know how I like to match stuff) but since they're different sizes and I waited until the last minute that didn't happen. Oh well.
My kids Halloween costumes this year:
Alex as a skeleton (which is perfect because he's solid black... and is really skinny at the back)
Sophie as a fairy (She floats around with the adorable wings)
Saturday, October 30, 2010
I have a serious problem...
You know life is too busy when the only updates on your blogs are of stuff you've bought/received and nothing you've created with such merchandise.
It's not that I haven't been creating, though, it's just that I have taken pictures of the stuff I created. I have been crafty, I promise!
I assisted a friend in creating her own "Family Rules" poster which turned out adorable. She was making it as a Christmas gift for someone in her family, and the rules were that it had to be handmade... So I made the dog poster (Sept 18 post) and then walked her through the steps of what worked and didn't work for me. We ended up using vinyl for her letters (though I swore I wouldn't ever again) and it turned out really really cute. It was a really fun day! She had her gorgeous kids over and we ordered pizza and our husbands talked about guy stuff... Quite lovely, indeed.
I've also been working on a Baby Book for my BFF Whit. I started it using Nursery Tails Imagine cartridge, but then it seemed to girly (and she has the cutest little boy ever) so I scratched that idea (threw ALL of it in the trash) and bought some Animal Stack paper from ACMs and have started over. I've gotten 4/20 pages finished, so it'll be awhile. It's cute, though.
I also made a card for my BFF Kymberlee, but of course I forgot to take pictures so I had to wait until she received her package and took pictures for me :-) I thought it was cute. This was actually the paper that inspired the new Baby Book.
I love that sentiment. It's so true, in my profession! :-D
Shall We Dance?
I've been really looking forward to getting the new Circle-Exclusive cartridge even though I have no interest whatsoever in dancing or creating stuff about dance. I hope it will come in handy eventually, however... I know a few dancers and if I get desperate enough I might be able to pull out an old memory book and borrow a few pictures of when I was a little ballerina.
Thursday, September 23, 2010
Imagine and Goodies!!!
A BIG shout-out to my BFF Kymberlee for sending me the most awesome package on Tuesday! I have had the craziest week and this is the first time I've gotten a chance to sit down since Sunday afternoon. I got my IMAGINE on Friday night, and have had the BEST time playing with it. But back to my Circle Pal...
Sooo here is my Imagine!! Exciting!! And HUGE!!
I LOVE it... You couldn't pry it from my cold, dead hands at this point!! It's amazing! Here it is sitting on my sewing table. I thought it would be a good fit, but honestly I wish I had a bigger table to set it on.
Saturday, September 18, 2010
Dog Rules
I finally created a piece of artwork to cover the 4 ft. wall above my dog cages at the front door. I might go back and add their names in vinyl above their cages, but I thought this was a great start! A couple of my background papers are a little too "busy," I think, but in real life it doesn't look bad. They're all readable.
I started off with a 24x30 canvas, painted it black and glued on strips of paper that I had cut with scissors to give the ripped effect. I added a layer of mod podge, then used black vinyl and my trusty cricut (and oh-so-many fonts I can't even name them all!) to create the phrases. I added another couple of layers of mod podge and my creation was ready to hang! The original idea came from The Pleated Poppy. I don't have any kids or need for "family rules," but I do have the next best thing... my precious puppies, Sophie and Alex. *Sorry for the glare, it's the best I could get!
BTW: I think this is all GREAT advice!
Dog Rules
Never pass up the opportunity to go for a joyride
Take naps and stretch before rising
Eat with enthusiasm, Stop when you've had enough
Never bark when a growl will do
Never pretend to be something you're not
Run, romp and play daily
When a loved one comes home always run to greet them
When it's in your best interest practice obedience
No matter how often you're scolded don't buy into the guilt thing and pout- run right back and make friends
Be loyal
Delight in the simple joy of a long walk
Monday, September 6, 2010
Happy Bird Day!
I finally made it to my sister's house tonight. While I was there I took a picture of the card I made her for her birthday that I forgot to take a picture of. I used 3 Birds on Parade. The inside says "Happy Bird-Day" (which matches my corny humor perfectly- I really couldn't believe they didn't have that expression on the cartridge.) She's supposed to take pictures of the finished book (which she absolutely loved, btw)
Sunday, September 5, 2010
Peacock Card
I made this card yesterday using French Manor (I seriously love that cartridge- it's worth my price into the Circle if nothing else!) for my mom to give to a co-worker moving to a new job. The peacock feathers are actually a patterned paper with glitter- you can't see that in the picture. I'm not good with sentiments so I left it blank. I did ink the edges around the inside so it would be cute, and I added 3 pearls on the envelope, along with a diamond shaped tag with pearls (didn't take a picture of that one, though). I think it turned out okay. I didn't like it at first, but it's starting to grow on me. Blues and browns look gorgeous together, I think! The paper is DCWV cardstock from the "At Home" stack.
And the inside
A's Birthday Banner
Here is my next Pooh Font project for my bff's daughter's 1st Birthday next weekend. I used the same paper (sent to me by my bff Kymberlee) along with black cardstock. I used the cheap walmart ribbon. There is so much action going on in the patterned paper, everything else is pretty simple. I started to add more (IMO more=better) but I know a lot of people prefer simple, so I kept it that way.
I hung it on my kitchen cabinet thing to show, but I've got grommets and ribbon on the ends so she'll be able to tie or hang it up when the time comes (or use packaging tape, like I did!) :-)
Saturday, September 4, 2010
Addy's First Birthday!
I'm helping my bff Caty get ready to celebrate her daughter's very first birthday in a couple of weeks, so I made some Winnie-the-Pooh invites to send out her for her party. I tried the traditional colors and wasn't happy with how they turned out, so I decided to give it a go using my style! The poohbear was white paper I inked (if you can call using a cotton ball and yellow stamp pad inking) and the patterned paper came from a party-themed set that my bf(online)f (and Circle Pal) Kymberlee sent me. I've still got a ton of it left to make more cool stuff- I absolutely love it! Anyway, I know black cardstock is a weird background for a girl's birthday card, but I thought it turned out really great. I used gold bling on the candle and stickles on the icing. The cake came from Stretch Your Imagination.
Here is what the insides look like (without the black boxes, of course):
And a sample of the variety:
I also made an adorable card for my bff Whitney all the way across the country, but I totally forgot to take a picture of it! And I had a picture of the goodies that Kymberlee sent me (A PINK ATG GUN!) in addition to the cute paper, but the camera on my brand-new phone was broken so it apparently didn't actually 'take.' The good news is that Verizon sent me a new Droid X today and the camera works!! Oh oh oh I also got Straight from the Nest in the mail yesterday from Cricut Rewards (I got that, two lanyards and a pack of mats for the totally amazing price of free... with only 11 bucks shipping!)
You're Tweet!
Yeah, yeah... I haven't posted in awhile (new job, remember!). I actually ALMOST posted on the last day of August, then decided that since my # of posts was so low for Aug. anyway, I would just wait and then post a bunch in September. (Crazy logic, yes) So my first project to show is a card I made for my new school family, thanking them for being SO wonderful welcoming me in! I used 3 Birds on Parade on my cricut, and used gorgeous (new favorite) paper called Songbird that I got on sale. I cut out the birdhouses from the paper (all of the red is glittered-so cute!) and put them on foam dots so they peek up a little. The ribbon came from the walmart.
Wednesday, August 11, 2010
Todays stuff
Alright... project of the day: Adorable personalized dog tags riveted into the new harnesses!
Yep. Did it myself! We went to PetSmart this morning and got new (coordinating) harnesses for the pups, and DH wanted to get them new dog tags, since Alex chewed his off and Sophie lost hers a couple of weeks ago. We found these adorable ones that fit perfectly! Used the crop-a-die to punch holes in the harness, then a small eyelet setter hammer to beat the metal into place, lol... My tools from the bind-it-all came in handy, too, when DH made Alex's first and it didn't turn out well, so we decided to take it out and try again... Zutter has the BEST pliers. They both got baths tonight and are happy as clams in their new wear! Here is a picture of poor Sophie in the bathtub. Bless her heart!
I had a request to post my craft room, soooo I straightened it up a bit and took some pictures. It took me awhile to find my camera cord (I put it somewhere before we left for vacation) but finally found it. Anyway, here is it! This is the left side... "Have a place for everything and everything in it's place."
Here is the right side (yep... I made those shelves from some wood and trim at Lowes!) I still want 13 more JetMax cubes to make things look good, but my stores no longer carry the good ones, so I'll have to save up my money and go shopping big-time one day!
Oops... looks like I'm missing the other wall... it just has a window, my sewing table, some plastic box-like shelves, and a door. You can kinda see the door and the shelf things in the picture above.
Alright... maybe I'll actually get something crafty done tomorrow! We'll see!
Monday, August 9, 2010
New dog cage = new blank wall space
Today I finally broke down and bought a bigger dog cage. Alex loves to stretch out and we felt so bad for him being cramped up in a tiny area (that's recommended for Miniature Schnauzers but is just TOO small!) so we decided to buy him one the same size as Sophies'. Of course things never go to plan, however, because our Walmart no longer sells anything I need. EVER. They only had 'intermediate' (What Alex already has) and Extra Large. Sooo I decided to give Sophie the bigger cage (she will be the one who has puppies, after all) and give Sophie's old cage to Alex. As soon as I put them in there they freaked out (they know better than to get in a cage that doesn't belong to them!) but after a little bit they were okay. They both stretched out on the sides closest to each other, so I think this will work!
The only problem is that now I've got a big blank wall space above their cages. The coat-rack was there before (and Christmas tree in winter) so no one ever saw that area. Now I need to do something to it! Ack!
Sunday, August 8, 2010
Laptop Decor
I decided to update the look of my laptop with some new Cricut Vinyl. I wanted to use the chandeliers from French Manor, and my sister added my name (from Mini Monograms) and the hearts (from Lovestruck). I'm really excited about how it turned out, though I will probably add in some more hot pink (had it on the last design) to fill in the middle spot (where a chandelier was put on upside-down... oops!)
Saturday, August 7, 2010
Busy Busy Busy
Soo I haven't posted in awhile. Just finished up being super-busy with Vacation Bible School and a trip to Myrtle Beach. I can honestly say I don't know which one was more fun!
My sister's birthday is coming up at the end of the month and I've had her present for awhile now but figured I better go ahead and wrap it so she won't see it if she comes over before then. I didn't have any cute wrapping paper, so I used sheets of 12x24 K&Co. paper to wrap the HUGE gift, and used fit-to-page on my Ella to write "Happy Birthday" using Celebrate with Flourish. I wish PC would hurry up and add this to my Gemma. She's missing out on some super-cute images! I used my phone to take the picture so it's not great quality. At the end of the month we should be getting our new Droid X phones though, and they are supposed to have a flippin' awesome camera. Then maybe my 2 am pictures will look better!
Anyway, hopefully more to come soon. Oh, and I became a Creative Memories consultant this week, too. I am going to be SO excited when my kit arrives. My favorite things!
Saturday, July 24, 2010
Freezer Paper Images
I haven't posted in a few days because I've been SUPER busy getting ready for SonQuest Rainforest Vacation Bible School at church. We've been hanging paper vines throughout the fellowship hall and I've spent hours upon hours painting the backdrop for the sanctuary. I did have a chance to play around the other night, however, with the freezer-paper technique of designing shirts. (I say this like it was fun, but in all honesty I was trying it out to hopefully use it for one of the crafts!)
Here is a sock-monkey from B is for Boy on scrap white fabric. Two layers was a little difficult; I still need to work on that. I didn't finish him... just trying it out.
Next is a white birdhouse from botanicals on scrap black fabric. (You can kind of see something else I was doing through the freezer paper background... disregard that! lol)
And here is one layer of the HM guitar. I tried this image because after watching a YouTube video (CleverSomeday- strawberry shirt) to learn the process, HappyHappyJoyJoy has a video posted where she's making this picture. I thought I'd give it a shot! Not too bad!
That's all for now. Hopefully after the kids decorate their tote-bags during VBS I'll upload some pictures to share. Maybe before then I'll get crafty again. Who knows!
Life has been VBS VBS VBS for the past week. After next Sunday I'll be absolutely exhausted!
Monday, July 19, 2010
New Baby Book- VERY GIRLY :-)
Here is a baby book I worked on last night and finished today (after helping the mothership make her pond look gorgeous!). I love love love the paper and almost didn't use it, just because it was so pretty. I used the same G file that I used on the last book, but with the different paper and accent pieces I think it has a completely different look!
Now that I look at the pictures, the pastel colors don't show up very well in the photo (and the fact that I took it in a dark kitchen at 1 am... It's really cute, though. I love the babies! (One is missing a belly button, though... I need to fix that!)
Next page... I used mostly New Arrival, but also threw in Sugar and Spice and Paper Doll Dress Up, too!) I inked the edges of everything, and used my bind-it-all (1 1/4 inch) to bind it. If you don't have one of these machines, you have no idea what you're missing. Even the husband loves it, and he is not a fan of crafting!
The paper is from Brenda Watson (In the same set I used to make the FM album in my previous post). There were 18 sheets of paper in this grouping, I think I used 17 and a half of them! Her designs are so beautiful, and the colors are pretty easy to match! (I love the safety pins... I used a silver marker to color the "metal" part. TOO CUTE!)
Next page... *sigh* I wish you could see the detail in the paper. The pictures truly don't do this book justice!
I put the MS border around the edge of the "giftbasket" which I thought was pretty cute! I colored the bottle and bear with the blender pens, the rolled towel is a different purple pattern from the set.
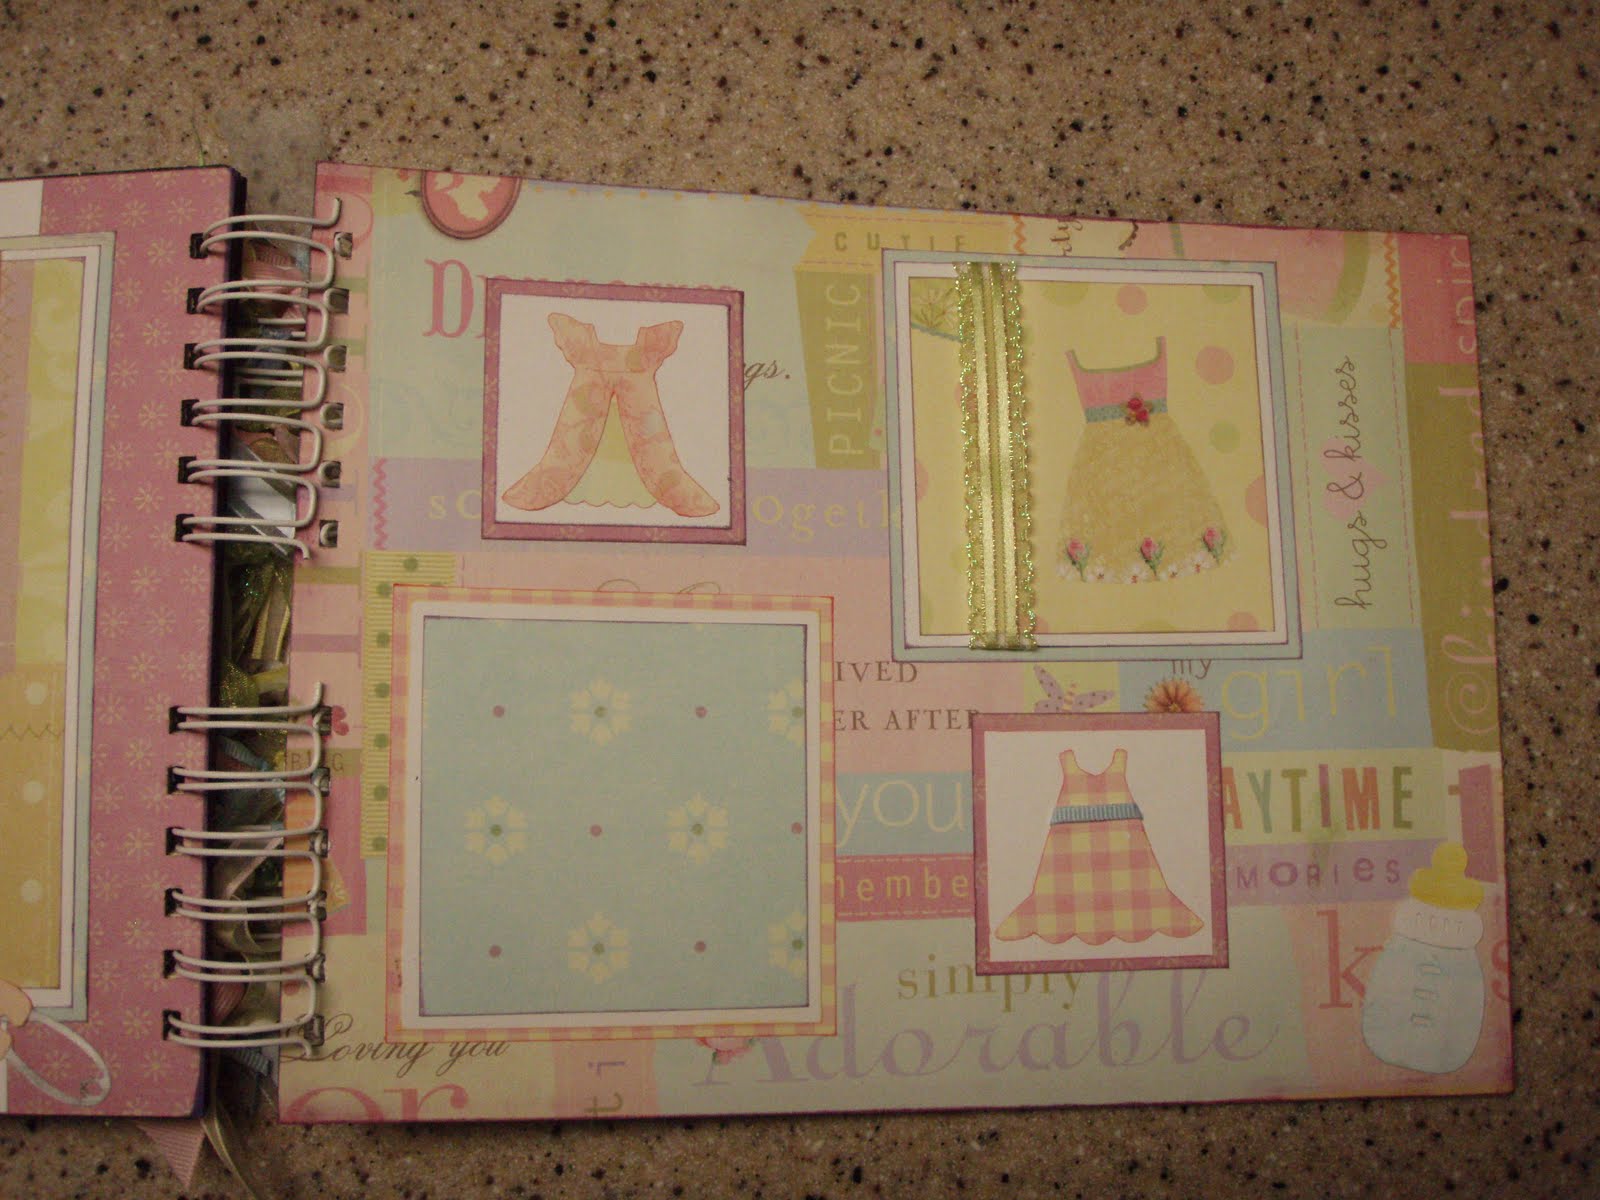
I love ribbon, too, if you haven't noticed! And this page is SO adorable! I love those dresses (cuts from PDDU). I thought the matted dresses matched the paper so well (the yellow one is the paper). Another example of bad photography: you can barely see the bottle in the corner. In real life, it really shows up nicely.
Here is the back page, I used one of the stork blankets to sign my name. I can't WAIT to get my stamp in the mail. It's going to be AWESOME :-) I do kind of like personalizing the books with an image that matches, though. And since I usually cut out about 5 times as many things as I need to, I've always got plenty of cuts to choose from!
And now my post at 3 am is finally finished. I think I rambled a lot, but it's because I'm kind of hyped up. The Martha Stewart Cake premiered on HSN tonight, and I won a cartridge through a contest they were having on Facebook. I can't seem to sleep, now!
Now that I look at the pictures, the pastel colors don't show up very well in the photo (and the fact that I took it in a dark kitchen at 1 am... It's really cute, though. I love the babies! (One is missing a belly button, though... I need to fix that!)
Next page... I used mostly New Arrival, but also threw in Sugar and Spice and Paper Doll Dress Up, too!) I inked the edges of everything, and used my bind-it-all (1 1/4 inch) to bind it. If you don't have one of these machines, you have no idea what you're missing. Even the husband loves it, and he is not a fan of crafting!
The paper is from Brenda Watson (In the same set I used to make the FM album in my previous post). There were 18 sheets of paper in this grouping, I think I used 17 and a half of them! Her designs are so beautiful, and the colors are pretty easy to match! (I love the safety pins... I used a silver marker to color the "metal" part. TOO CUTE!)
Next page... *sigh* I wish you could see the detail in the paper. The pictures truly don't do this book justice!
I LOVE the carriage on Sugar and Spice! And right now I'm addicted to the MS punch... it just sat on my table waiting to be incorporated into this book! I also used Stampin' Up blender pens A LOT. I've got a couple sets of the Stampin' Spots, and the colors i have seem to flow seamlessly into the design.
I put the MS border around the edge of the "giftbasket" which I thought was pretty cute! I colored the bottle and bear with the blender pens, the rolled towel is a different purple pattern from the set.
I love ribbon, too, if you haven't noticed! And this page is SO adorable! I love those dresses (cuts from PDDU). I thought the matted dresses matched the paper so well (the yellow one is the paper). Another example of bad photography: you can barely see the bottle in the corner. In real life, it really shows up nicely.
Here is the back page, I used one of the stork blankets to sign my name. I can't WAIT to get my stamp in the mail. It's going to be AWESOME :-) I do kind of like personalizing the books with an image that matches, though. And since I usually cut out about 5 times as many things as I need to, I've always got plenty of cuts to choose from!
And now my post at 3 am is finally finished. I think I rambled a lot, but it's because I'm kind of hyped up. The Martha Stewart Cake premiered on HSN tonight, and I won a cartridge through a contest they were having on Facebook. I can't seem to sleep, now!
Saturday, July 17, 2010
Amore Album
Last night while using my Cricut to cut out pieces for a new baby book I'm in the process of creating, I decided to use my scraps to make a simple album using French Manor. The book is 6 inches tall and the longest page is 12 inches wide.
Pretty simple and classy, I think. The journaling spot on the first page is for explaining what's in the book, or to/from if it was a gift.
I used a Martha Stewart punch to do the borders in black. I just thought that page needed something!
I LOVE the furniture on this cart. And the borders! The next page is pretty simple... I might go back and add something. It would work great for a close-up portrait, though!
And the next page
I wish I had some different ribbon on here, but I don't think I've ever used black/ivory as my color scheme so I had to use what I had on hand. That consisted of skinny black, skinny ivory, skinny polka-dots, and thick polka-dots.
I LOVE the peacock. I didn't put his tail on straight on purpose, just to give it some depth. And the chair is just to cute. And I love the border... which reminds me how much I love my Gypsy!
And on the back I had this amazing frame left over (You can't see the ivory details, but trust me, they're there!) so I used it to write my name on, along with a cute little bird cut.
All of the paper came from a new stack I bought at ACM's by Brenda Watson. The new Baby Book is using her paper, too. I love her designs!!
Thursday, July 15, 2010
New Baby Book
I started this a couple of months ago but I couldn't finish it for some crazy reason... It's intentions were to go to my mom's co-worker who was expecting, but I just could not finish it. So, I put it away for awhile and last night got it back out and poof! it's done! Luckily I had the gypsy file saved so there was no worry about sizing and pieces I had thought about using.
Here are the first two pages, where a little note for the mom/baby would go...
Next pages... the outfits are kind of hard to see, but I inked the edges so in real life it doesn't hurt your eyes like it does on here!
And then... some of the frames have little pearls on the corners, and you can't really see the cute green stork above the frame on the second page.
I just loved the presents and outfit on this page... there is a pearl on the flower of the shirt, and the rattle has pearls, too. One of the packages has stickles on the "ribbon" to make it sparkle!
Here is the matching page...
Here is a closeup of the pearls that you can't see on the other pictures... not that you can really see it on here, either.
More details that don't clash in real life...
And lastly, here is the back. I ordered a personalized stamp in the mail a few days ago to "brand" my work, but it hasn't come yet. Until then I'll continue my tradition of just writing my name. This little onesie says "Made with 100% LO<3VE" :-)
I think it's b-e-a-u-t-i-f-u-l and it will probably make a good gift one day.
Subscribe to:
Posts (Atom)