Showing posts with label Imagine. Show all posts

Sunday, June 19, 2011

Father's Day Cards

Although my dad passed away in 2000, I've got a couple of special guys in my life that get Father's Day cards. The first is for my mom's SO... we all chipped in to get him a new refrigerator so I used Kate's Kitchen and my Imagine to make him a themed card.


Inside: (Left blank spaces for everyone else to sign)

And this one is for my husband's father.

Inside:

Saturday, June 18, 2011

Congratulations!

It's not very often I make "Congrats" cards, but I've got a few things going on this year. My husband's step-sister graduated college a few weeks ago, so I used my Imagine to make a unique card for her. I think I used the Imagine More Cards for everything, except the "Congratulations" stamp on the front envelope, which I got from... who knows where! 


I also made certificates for each student in my 2nd grade class, along with 2 ribbons for the students with the highest accelerated reader points, and highest percentage. One of my academically-gifted boys earned the percentage ribbon, and one of my star students won the points. She love monkeys, so I used browns and yellows for hers. I cut out the A+ from Pooh Font, I think. The kids really loved them, but I actually had a couple others cry because they didn't win :-(.

I got the inspiration and directions from Circle Nadia's blog post, which I love to visit. She is seriously one of the most talented people I've ever (not) met. :-D

Friday, April 29, 2011

Circle Challenge: Reduce, Reuse, Recycle

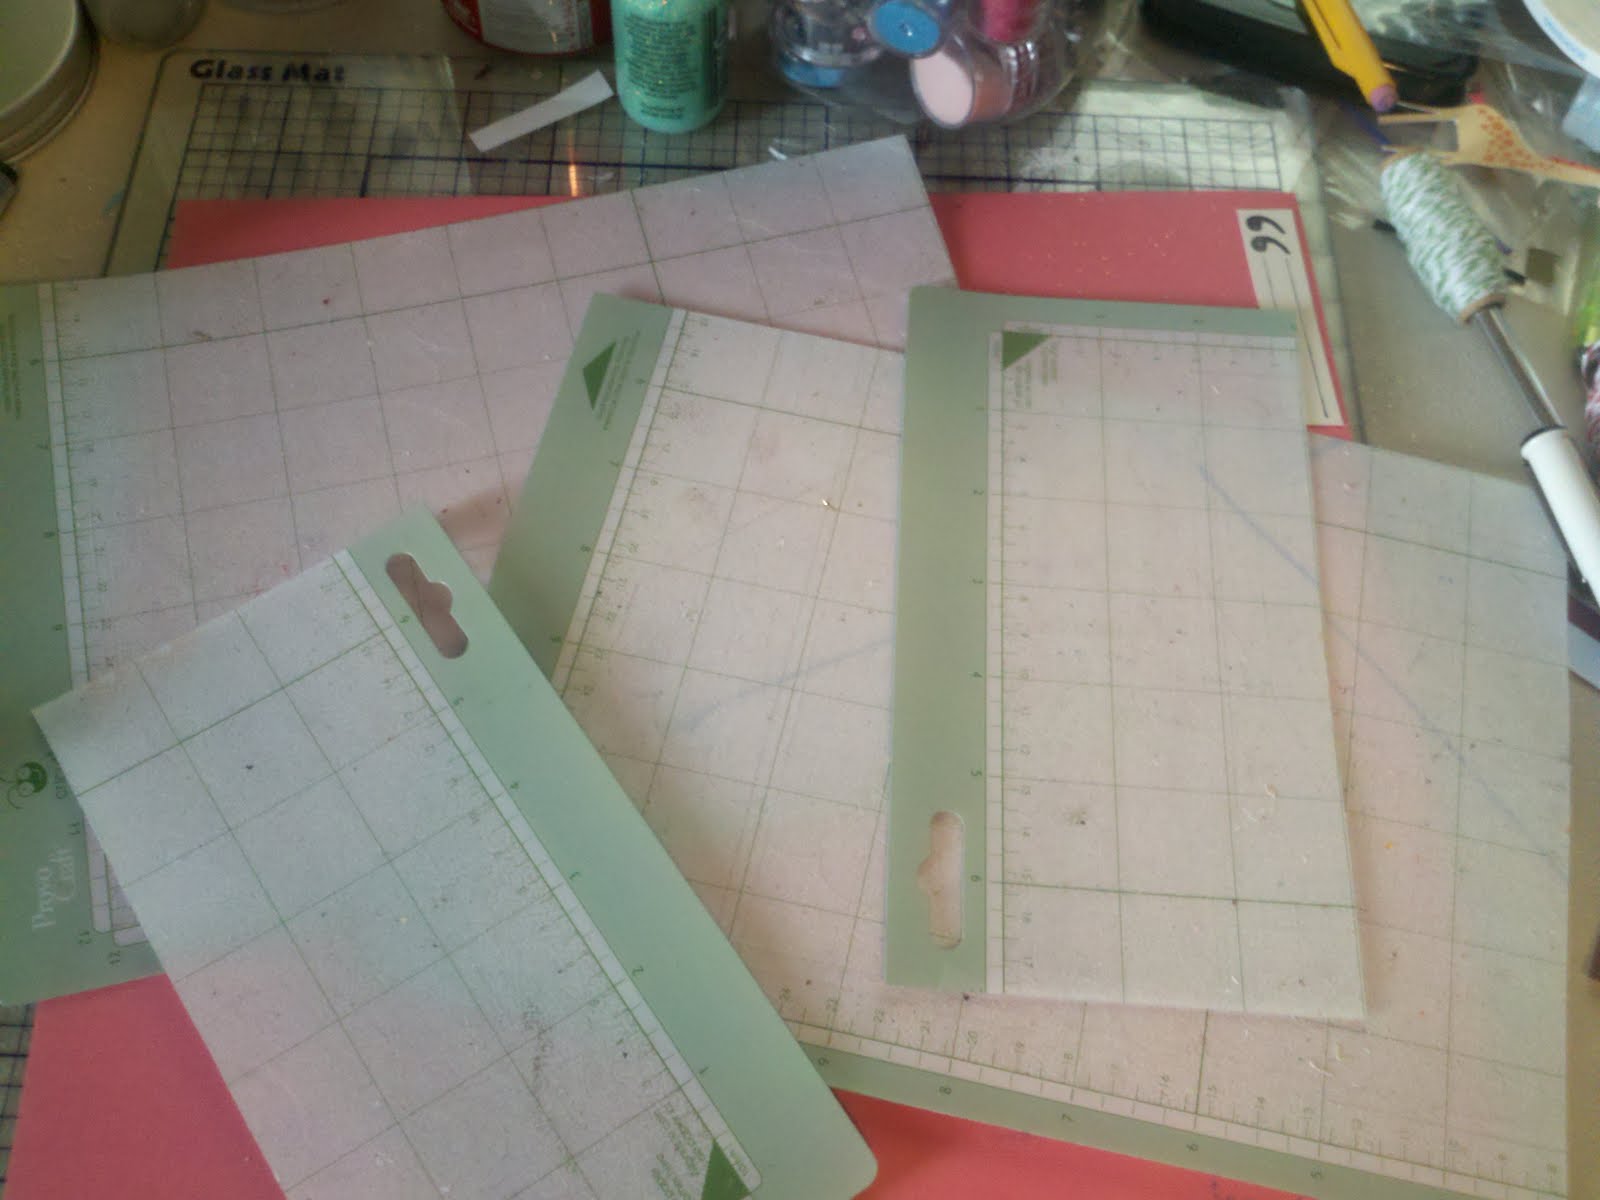
This month's Circle Challenge was to create a project and reuse, recycle, or repurpose 3 items, and include at least 2 Cricut cuts. I decided to think outside the box.... or, more accurately... think of my own box purse! I have been saving my old Cricut mats for years now, and finally figured out something to do with them. I used two old mats to cut the base for my purse (roughly 10"long, 3.5"wide, 7.5"deep) and attached using packaging tape.

After taping, I used my MS scoreboard to score folds before gluing the paper onto the mats. 
 Coming along...
After I did the outside, I put paper on the inside, as well. K&Co. had some cute light green paper (12.24) I was able to use so that the bottom didn't have edges... they were just folds. 
The next reused item was the ribbon I trimmed the purse with and used as a handle. When my Sophie had pups, they began wandering very early, and I desperately needed something to tie them up with, since they were too small for collars/leashes. I was able to make little collars and leashes using my beloved ribbon. You can't even tell it spent 4 weeks tied to my porch with a little munchkin on the end, can you?!? :-D 
 I used grommets to reinforce the handles, and then on the back I made a real pocket, just for fun. 

My third reused item (if you don't count the paper stack I have recycled many times for various projects, and the fact that I used scrap paper for all of the solids except flowers/sun) are a few of the Cricut cuts. The red scallop came from something else, and I noticed it only after cutting out one from patterned paper, thinking it looked too flashy. I can't remember what project I had originally used the red scallop for, but it fit perfect, I think, behind the tree. It actually fit even more perfect than the circle I cut out but didn't like! And the fence was leftover from the bulldog house I made for my school. It definitely looks better on here than it did there! I was able to trim off the parts I had ripped off the doghouse, and ink it and add nails as necessary. The birdies also covered up accident-spots. 

I used Straight from the Nest for the birds 3.5" and the tree at 5" (except for Sentimentals, for the red back part... I have no idea what I had cut that out at originally), and Paper Doll Dress Up for the picket fence. In order to color match, I used my Imagine to print and cut the flowers and sun from Give a Hoot (I can't believe I'm saying this, but I actually forgot that I had received it for Christmas until I was letting my little sister borrow my craft room for an FCCLA project yesterday!) A cute face was the perfect stamp on the sun, which of course I got from Peachy Keen stamps.  I cut the owl in the tree from the paper stack. Here are a few more pictures... hopefully at least one of them will do it justice!


And of course I stamped the bottom to prove that I really did make it! I love the wood pattern!

Saturday, April 9, 2011

Cards

For my birthday, Kymberlee bought me the cutest stamps from Papertrey Ink. I made several thank-you cards with them last weekend.

Here for my sister (Since she painted me the gorgeous dogs!)


Here's the one I made my mom... my favorite pen busted while I was working on it and so I had to write the words with another pen... totally looks homemade :-/


And here's one I made (but forgot to give) to a lady at school who was collecting kitchen-themed items for a giftbasket. I used paper printed from Kate's Kitchen. 

Thursday, April 7, 2011

Birthday Card for Allycat

Funny story. I made my little sister a birthday card (her birthday was even before mine- that's how far behind on life I am) and put it in the top of her box, since I didn't have an envelope. Somehow, as she was opening the box, she flung the (beautiful, time-consuming, precious) card I made and it fell in the dog's water bowl. And of course since I FINALLY used my imagine to make a card instead of "real" cardstock, the image immediately blurred and eventually disappeared. Haha. Maybe I should stick with regular paper and not try printing. I used Imagine More Cards for this, along with the pretty pretty ribbon Kymberlee sent me. 


Friday, November 5, 2010

Awww, Love You! Imagine

I haven't made anything with my Imagine in awhile (since the crocodile on Kymberlee's card that I totally forgot to list as such), so tonight I made a little note for my Dear Husband who I haven't seen today. I wrote a little message at the bottom and left it on the counter so when he gets home he'll know that I thought about him. Such a sweetheart :-p. The picture's not that good, but it's cute in real life (and took like 5 seconds to put together- the Imagine does ALL the work!)

Thursday, September 23, 2010

Imagine and Goodies!!!

A BIG shout-out to my BFF Kymberlee for sending me the most awesome package on Tuesday! I have had the craziest week and this is the first time I've gotten a chance to sit down since Sunday afternoon. I got my IMAGINE on Friday night, and have had the BEST time playing with it. But back to my Circle Pal...


Sooo here is my Imagine!! Exciting!! And HUGE!!


I LOVE it... You couldn't pry it from my cold, dead hands at this point!! It's amazing! Here it is sitting on my sewing table. I thought it would be a good fit, but honestly I wish I had a bigger table to set it on.


I have made several things with it already- here is an example of the wonderfulness. I love how I don't have to use so many sheets of different color papers for one small project. Here I made a pencil from Simply Charmed (thanks again, Kymberlee!!!). I don't have a picture of the finished project (took it to school- it's so cute!) but this is a perfect example of how amazing this machine is.

Library Shelf Stained Glass

 My basement guest room has a deep window that is eye-level with our drive-way. When we moved in I decorated the room with a dark cottage co...