I created this 12x18 panel for my nephew, who isn't old enough to appreciate it yet but hopefully will one day. I wanted to document the process so I tried to take tons of photos. I was really proud of this one, as I used this photo I saw online from a book to reach my vision. I think it's from a Fantastic Beasts book, but the search feature led me nowhere.
First I traced the photo with Procreate on my iPad. I did this several times, simplifying over and over again until I had pieces that I was comfortable cutting out with glass. Not having too many intersecting angles and tiny bits that would get covered by solder are top priorities. After drawing it about 7-8 times, I had this image.
I added a background and printed it out full size on sticker paper. I should've printed out an additional copy to lay my pieces down on as I cut them, but hey, I'm still learning! I cut out each sticker by hand as a template for my glass sizes. This was a process.
A lot of artists cut out all pieces and foil them first, but I tend to do bits at a time. I did the entire frame first, to make sure my size was good.
Here is the process of stained glass with one of the trees.
1. Cut out the pattern. I numbered the pieces to do different shades of green and then changed my mind. Also at that point my pieces weren't quite lining up so I traced what I had already foiled to make a somewhat new pattern.
2. Lay out the pieces on the glass. I used sticker paper which is genius. I also like to add a straight line to I'll line up the direction of the glass correctly.
3. Cut out the glass pieces.
4. Grind each piece to remove rough edges. The better the cut, the less grinding there is. I'm definitely still learning this.
5. Put it together.
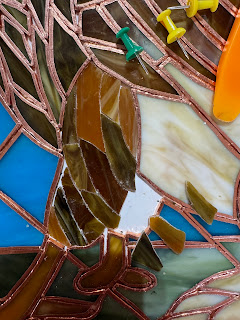
6. Remove the sticker paper and lay it out to make sure it fits. You'll see that piece in the middle with the space didn't look like a big deal at this time.
7. Add copper foil and pin down. Look for any inconsistencies. You'll see that little hole is bitter so I wanted to redo it.
I put a piece of sticker paper down, traced, recut and ground down, and then re-foiled.
And there you have it, a tree!
After finishing the foiling, I soldered the panel and scrubbed clean. I also added two hooks at the top.
I used a black patina to stain. And cleaned again!
Then I added a nice polish.
And here is the finished project.


